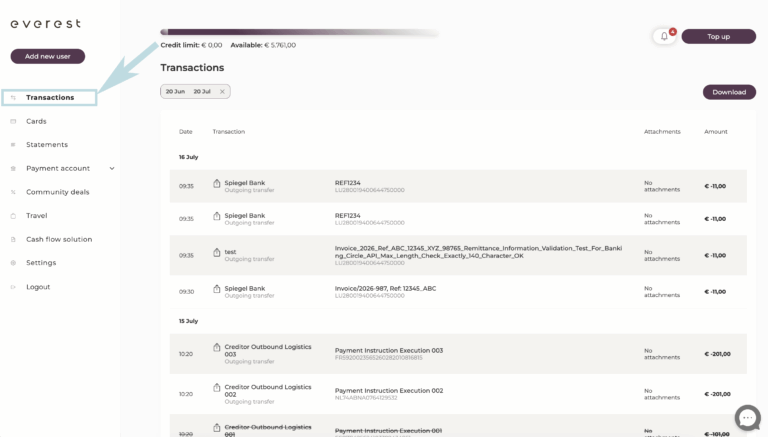
Bulk payments
A step-by-step guide to uploading, reviewing and authorising a batch of payments
Bulk payments let you pay salaries, suppliers or invoices in a single upload instead of entering each transfer manually. This guide walks you through the full process, from uploading your file to seeing the payments land in your transaction history.
Before you start:
- You’ll need a PAIN.001.001.03 XML file with your payment details (beneficiaries, IBANs, amounts and references): most accounting and payroll systems can export this format directly.
- A single file can contain up to 1,000 payments.
- You need admin or accountant access to your everest account to upload and authorise bulk payments.
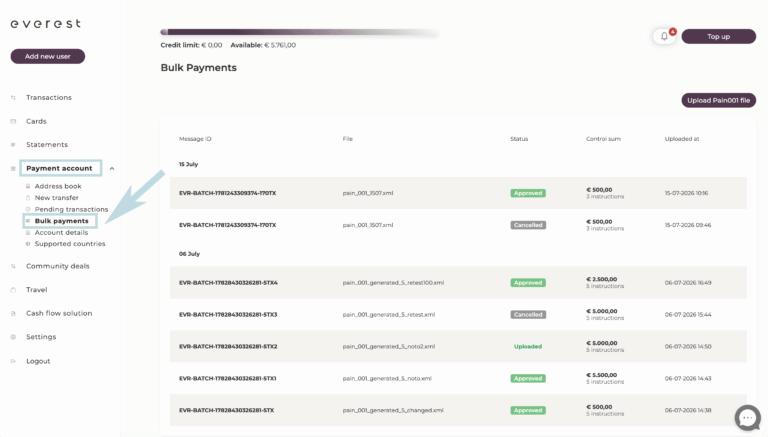
Open the Bulk payments section
In the left-hand menu, go to Payment account → Bulk payments. This shows every batch you’ve uploaded before, along with its status. To start a new one, click Upload Pain001 file in the top-right corner.
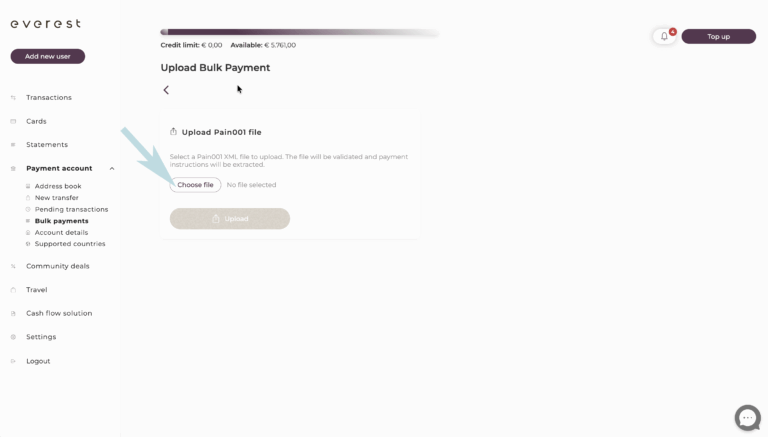
Select your Pain001 file
Click Choose file and select the PAIN.001 XML file you exported from your accounting or payroll system.
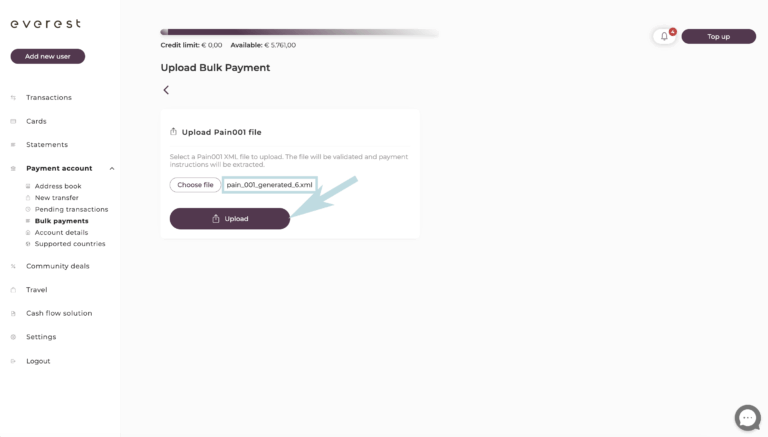
Upload the file
Once selected, the file name appears and the Upload button becomes active. Click Upload to send the file to everest.
Check the batch details
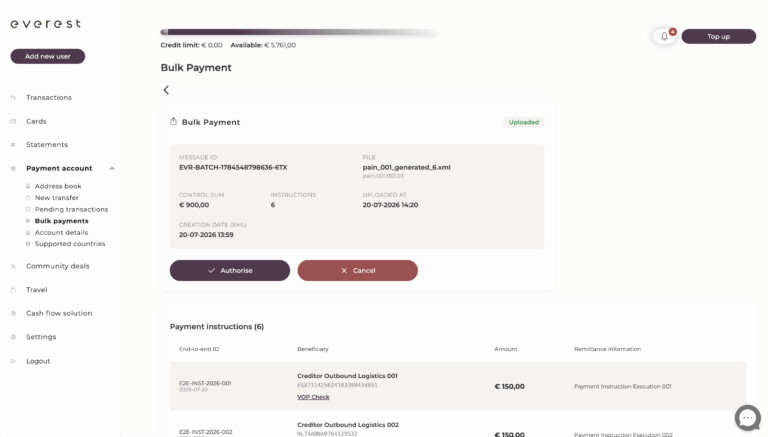
everest validates the file and extracts the payment instructions. You’ll land on the Bulk Payment detail page with status Uploaded — this is your review screen before anything is paid. It shows the message ID, control sum (total amount), number of instructions, and upload time.
Run a VOP Check on each beneficiary
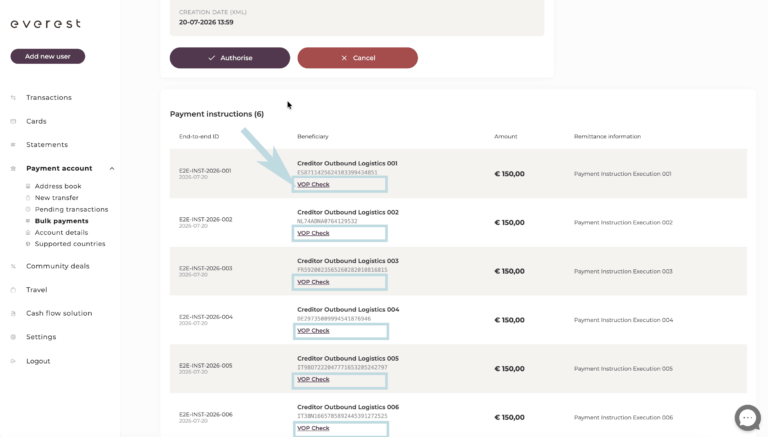
Scroll down to Payment instructions. Each row shows a VOP Check link — this is a Verification of Payee check, confirming the beneficiary name matches the IBAN before you pay.
It’s optional but recommended, especially for new beneficiaries.
Passed checks turn green
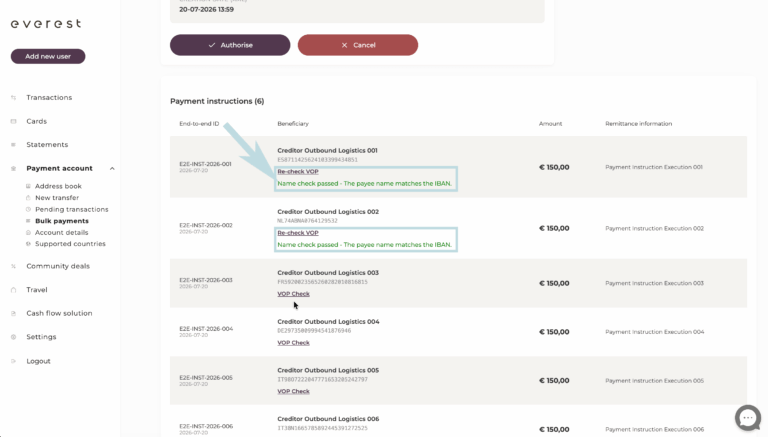
Once you run a check, a passed verification shows in green with a confirmation message, and the link changes to Re-check VOP so you can run it again anytime before authorising. Rows you haven’t checked yet still show the original VOP Check link.
Approve the payment run
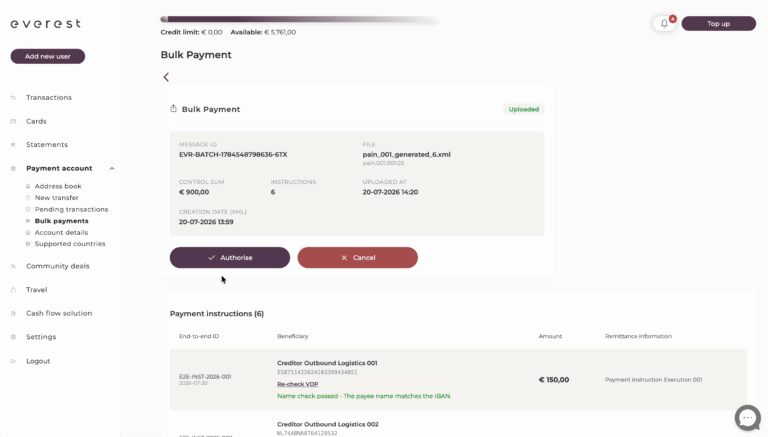
Once you’re satisfied everything is correct, scroll back to the top and click Authorise. If something looks wrong, click Cancel instead — no payments will be made.
Your payments are on their way
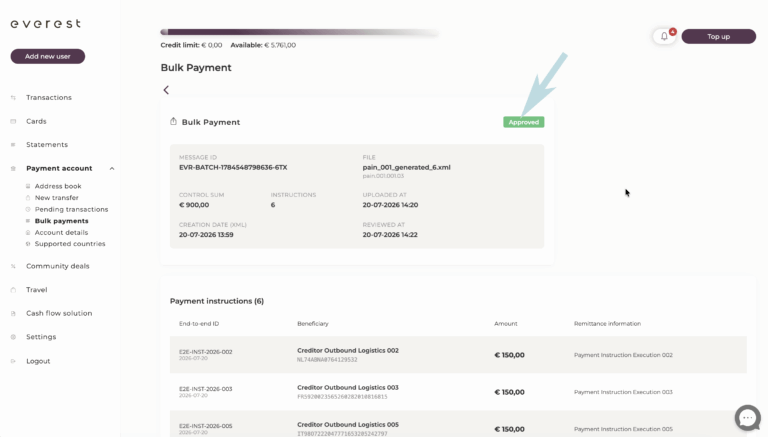
The status changes to Approved. Valid payments are processed even if one or two rows had issues, so a single bad line never delays the rest of the batch. The full record — file, control sum, upload and review timestamps — stays available for your audit trail.
Find it under Pending transactions
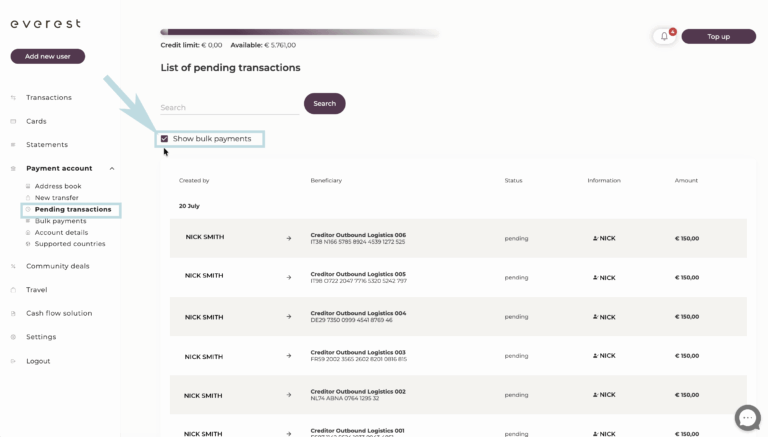
Go to Payment account → Pending transactions and tick “Show bulk payments”. This groups every item from your bulk upload — still being processed — alongside your regular pending transfers, so you always know what’s still in progress.
See the individual payments once processed
Once processed, each payment from the batch appears as its own entry in the “Transactions” tab, just like any other completed transfer.